Rendang daging deep-dive: Part I
A guest post by Ling Teo.
✨ Welcome to Singapore Noodles, a newsletter dedicated to celebrating Asian culinary traditions and food cultures. Being 100% reader-funded, each paid subscription supports the writing and research, pays guest-writers, and gives you access to all content and recipes in the archive. My recently published cookbook, Plantasia: A Vegetarian Cookbook Through Asia, is now available at Now Serving LA and Kitchen Arts and Letters amongst other stockists all around the world, and also here.
For this week’s instalment, I’ve invited Ling Teo, my friend and fabulous cook, to write a two-part newsletter on beef rendang. While beef is the star here, the same principles apply if you’d like to make rendang with other proteins. Ling has packed this and the next newsletter with so much kitchen wisdom and tips — I hope you’ll enjoy reading them as much as I have. - Pamelia ✨
Rendang Daging
by Ling Teo
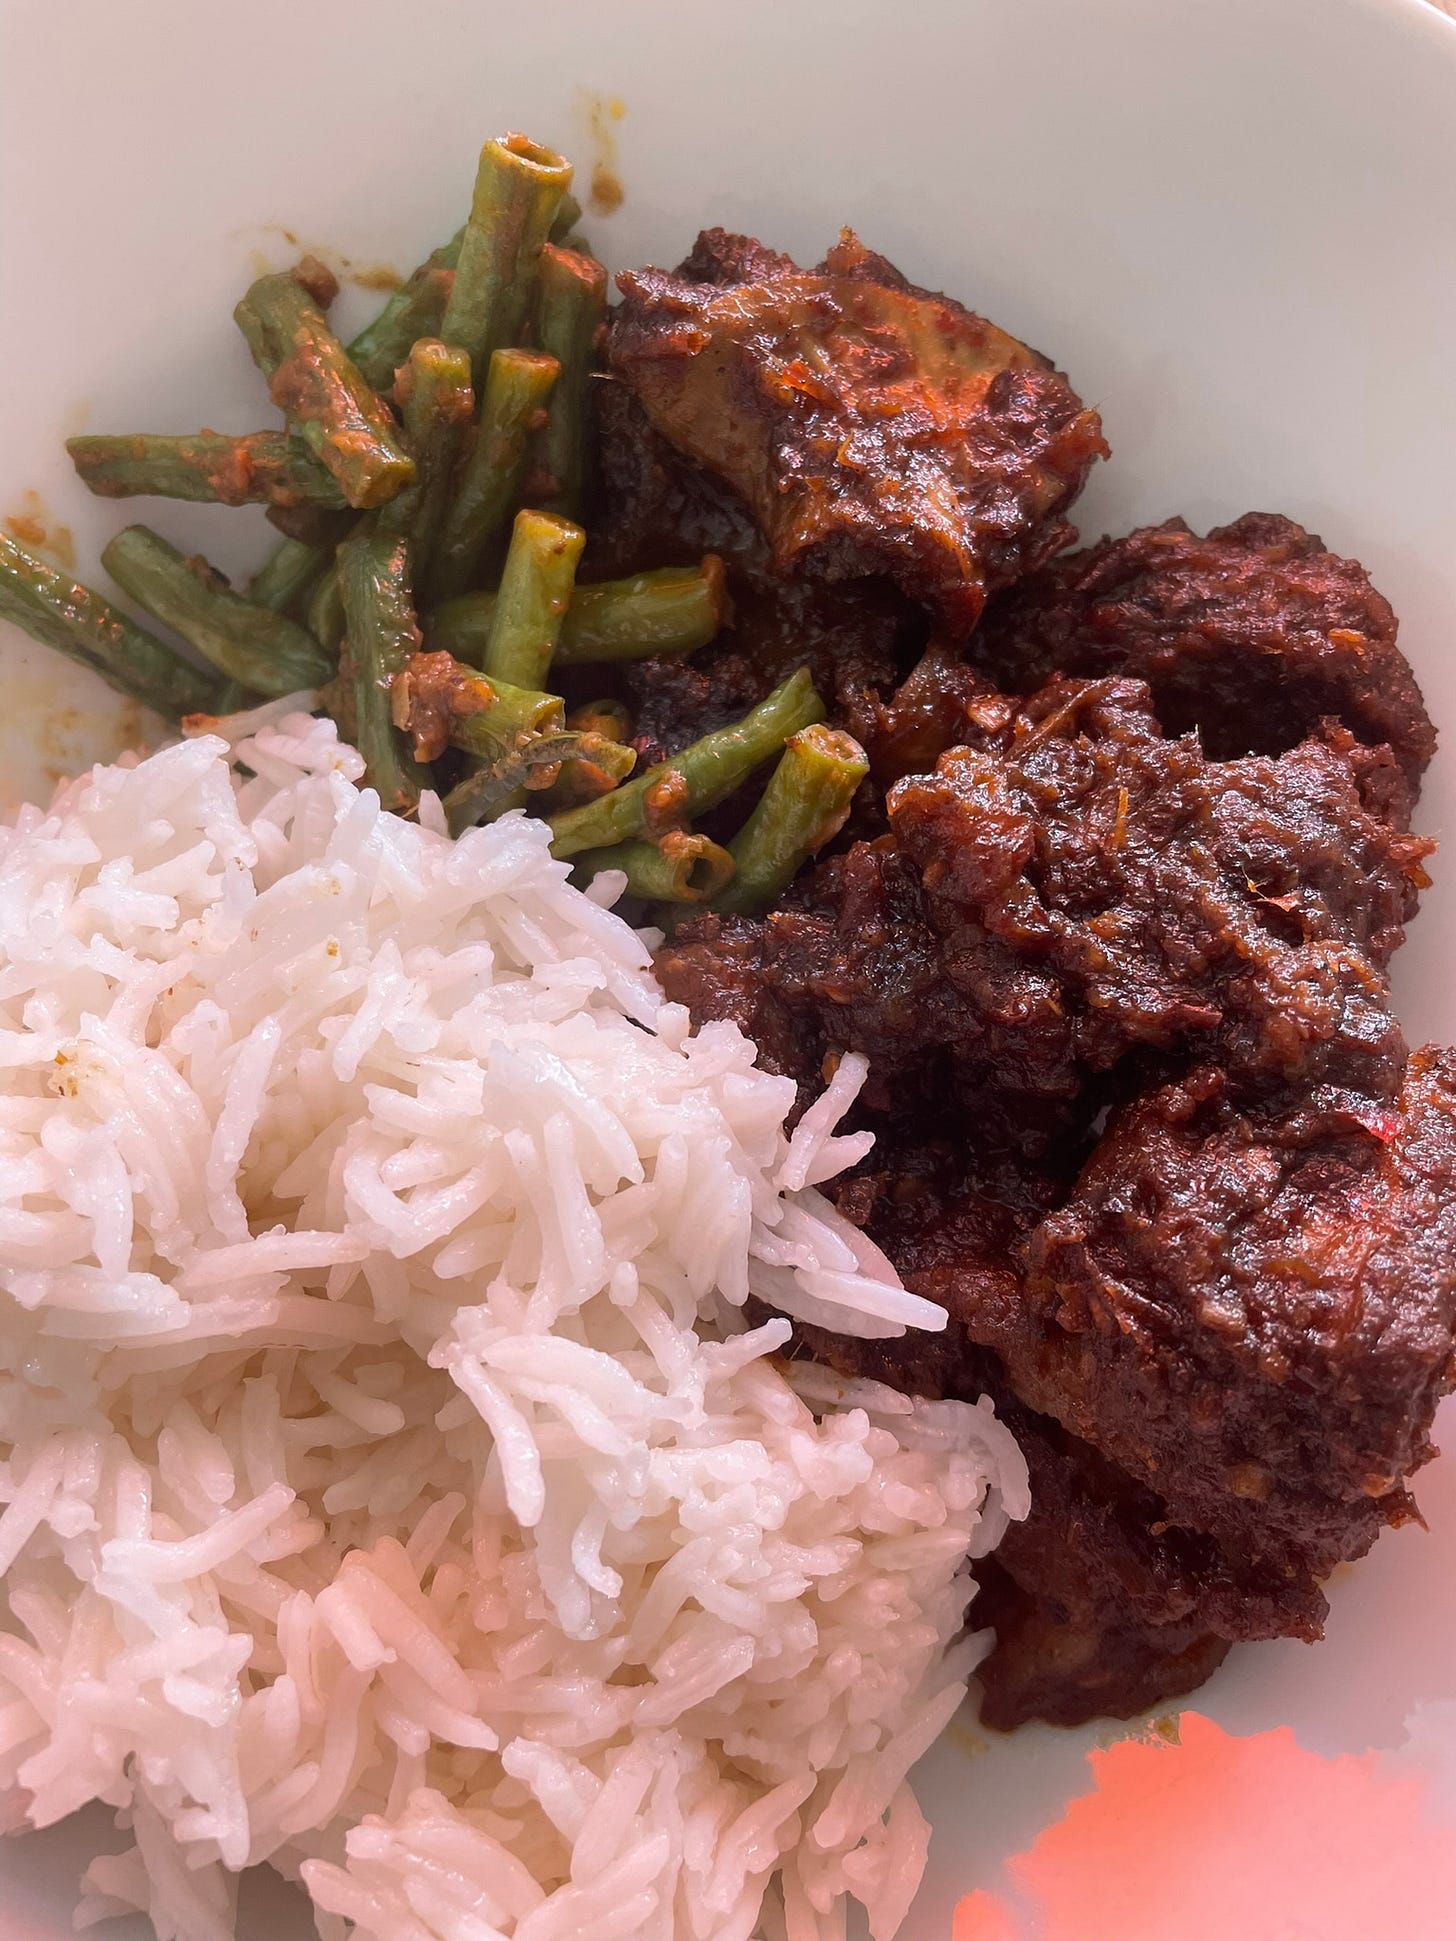
My earliest memory of my Mum’s rendang daging — slow-cooked, caramelised beef smothered in a rich, spicy coconut gravy — was of it being a special occasion dish, given the complexity of the cooking process and the time required to make it. You first catch a whiff of the rich, nutty aroma of beef and coconut fat, followed by the mellow, savoury taste of warm spices and three types of caramelised roots: ginger, galangal, and turmeric. As you bite into the succulent, tender chunks of beef, a warming chilli and pepper heat blooms in your belly, releasing the aromatic top notes of lemongrass and lime leaf and leaving you with a lingering sweetness from the caramelisation of the shallots and garlic. Once you’ve had a proper rendang, the taste and aroma are imprinted in your mind, and any deviation from it is quickly noted…
Something happened between the rendangs of my youth and the rendangs that I recall eating outside the home. Rendang came to inhabit this strange, liminal space between a highly-regarded, special-occasion dish and one that people also wanted easy access to — either ordering it in popular Indonesian/Padang, Malay, or Peranakan restaurants; or by ripping open a package from one of the burgeoning range of commercially-prepared, ready-to-cook spice paste brands, chucking the contents into a pot with some meat, and calling it rendang in under two hours’ of cooking.
I’ve had rendangs with cubes of undercooked meat submerged in a watery chilli gravy; rendangs with meat so dry and stringy it almost passed for a badly-made dendeng; rendangs with half-heartedly caramelised gravy; and the absolute worst — rendangs reeking and tasting of rancid coconut. There was an instance of someone talking up their rendang recipe to the point of all others being inferior, and it was accidentally revealed during the meal when this person served the dish that they use packs of commercially-prepared rendang rempah, instead of making it from scratch. It was both hilarious and embarrassing to witness the ‘pecah lobang’ (literally 'broken hole'; Malay idiom for accidentally revealing a secret) of this rather sly move. How did it taste? Sadly, it was as hinted above: tasting of rancid coconut, plagued by a dull, soulless flavour, and was overly salty. So, it really pays to steer clear of these ready-to-cook rempahs and give this dish the preparatory respect that it commands.
When Pamelia asked if I would be keen in guest-writing this deep-dive, I agreed as I had a few birds to kill with this stone: to finesse my current rendang recipe (a sheet of A4 paper with lines of almost-illegible scribble taken down as my Mum rattled off her recipe over the phone); exorcise the memory of rendangs that had been sold to me as authentic; and most importantly, offer an response to what constitutes a carefully-prepared rendang and in the process of doing so, hopefully take away some of the confusion and assumptions about this iconic dish. What will be clear at the end of reading this is that making a rendang involves a lot of careful, patient, and intentional stirring and scraping. So brace yourself physically and mentally!
A search of the Internet discloses a good few articles and blog entries expounding on rendang’s Indonesian origins (specifically Minangkabau, from West Sumatra) and the cooking process. A translation of ‘rendang’ in The Great Dictionary of the Indonesian Language (Kamus Besar Bahasa Indonesia) is “meat fried in coconut milk until the sauce is completely dry, all that remains are pieces of meat with the spices” (verb: merendang; to cook a rendang). Sources also state that the rendang process, with the ingredients used, aims to tenderise tough cuts of beef and preserve them. For completeness, beef isn’t the only ingredient that can be made into rendang — there are rendangs of various other meats, offal, egg, seafood, and hearty vegetables such as jackfruit or cassava.
Here's a round-up of the ingredients for this recipe for explanatory purposes:
The rempah
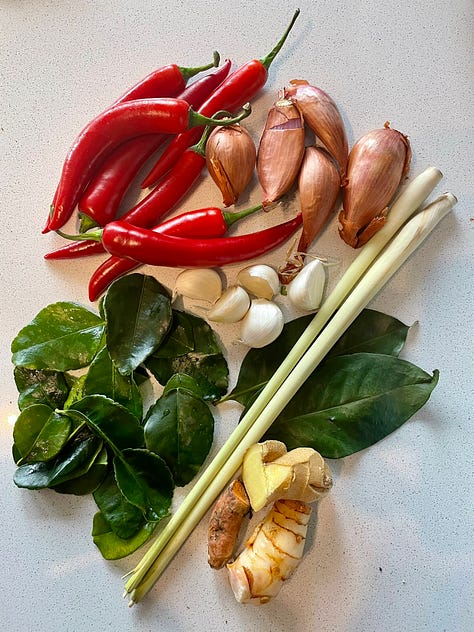
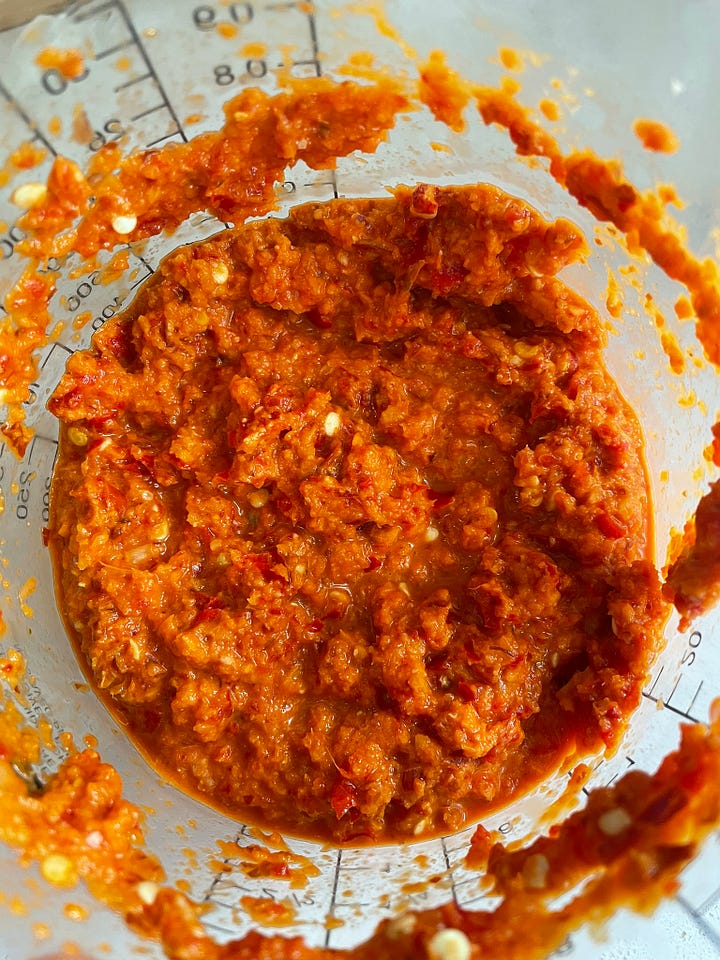
Fresh ingredients: fresh chillies, shallots, garlic, lemongrass (bashed all along its length and tied as tightly as possible into a knot), Indonesian bay leaves (daun salam), makrut lime leaves, ginger, galangal, and turmeric.
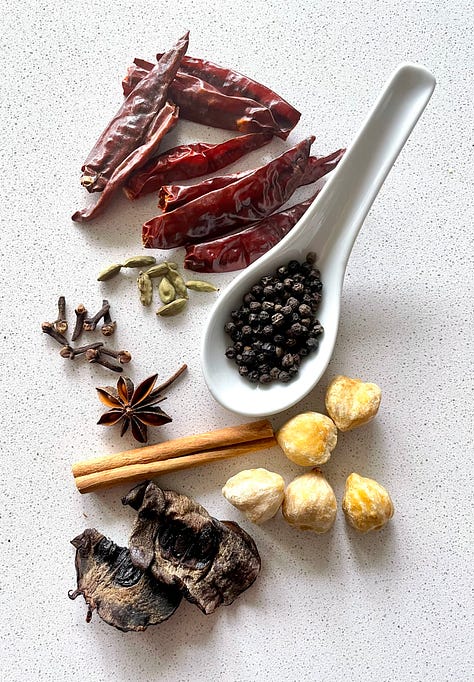
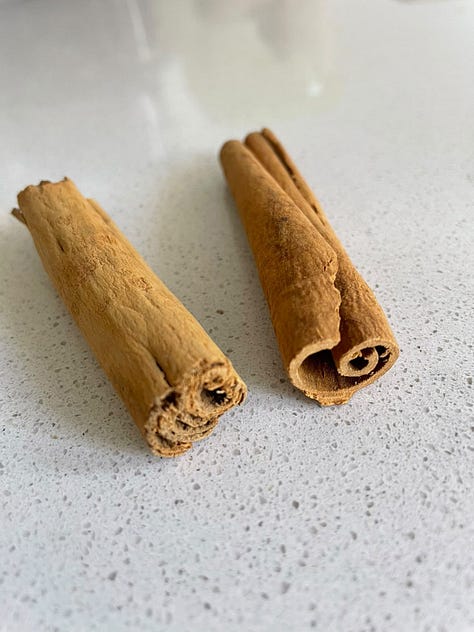
Dried ingredients: dried chillies, green cardamom pods, black peppercorns, star anise, cloves, candlenuts (it’s easier to process them in the rempah if you whack them gently to break them up), dried garcinia atroviridis slices or asam gelugor (a possible substitute is tamarind pulp), and cassia bark. Cassia bark is often marketed as ‘cinnamon’, so some clarification is in order. Cinnamon (‘true’ or ‘Ceylon’ cinnamon) is derived from the inner bark of the Cinnamomum verum tree. It is thin and brittle in texture, with a sweet, warm, and floral aroma, with fresh green leaf notes. It’s used in desserts and other recipes when a nuanced flavour is required. Cassia bark, on the other hand, is the bark of the Cinnamomum cassia tree; it is significantly thicker and harder to snap than cinnamon and has a stronger, spicier, almost woody aroma. Cassia bark is used in savoury applications like stews, curries, and some baked goods that require a more pronounced cinnamon flavour.
The dried spices are toasted and pulverised into a powder before being ground into a rempah with the rest of the ingredients. The key is to not grind the rempah too finely. With the long cooking time, all the ingredients will soften and break down anyway. And I like some texture in the final gravy.

The coconut products
Coconut milk and coconut cream: I tend to use Thai brands (such as Aroy-D or Chaokoh), they taste and smell closer to the freshly-squeezed stuff. The Kara brand products (except for the organic ones) smell a bit too emphatically coconutty, and not in a good way…
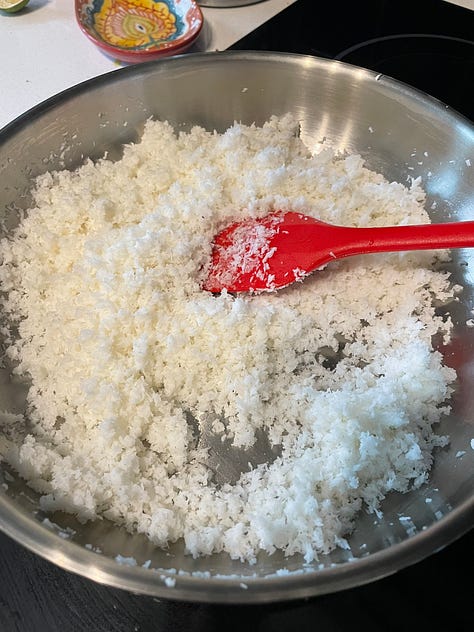
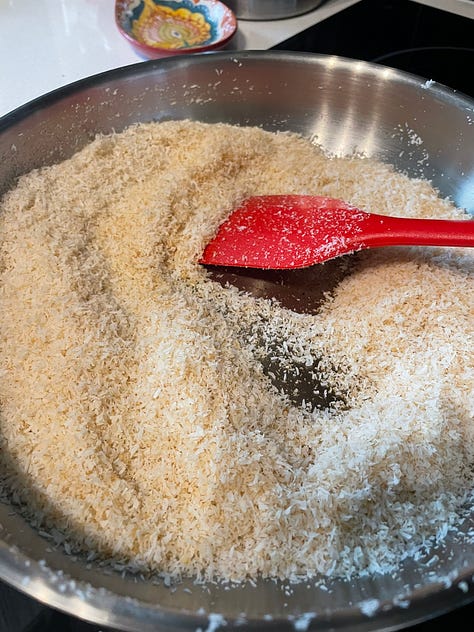
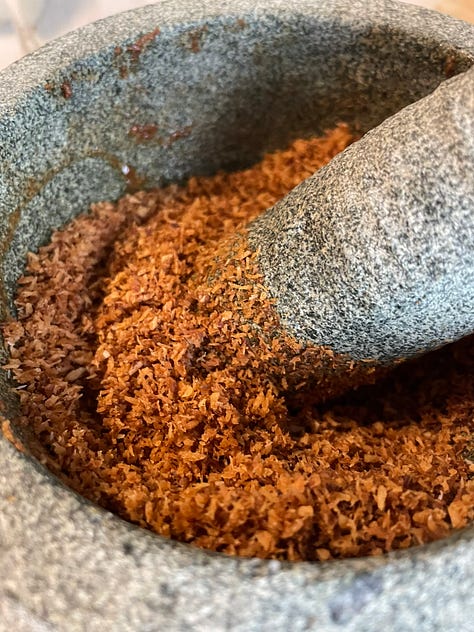
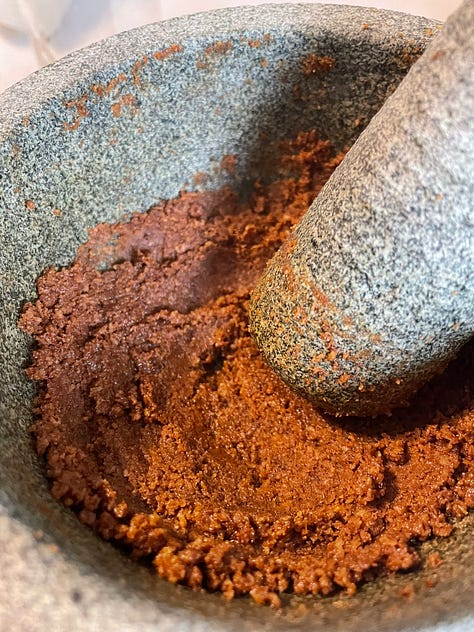
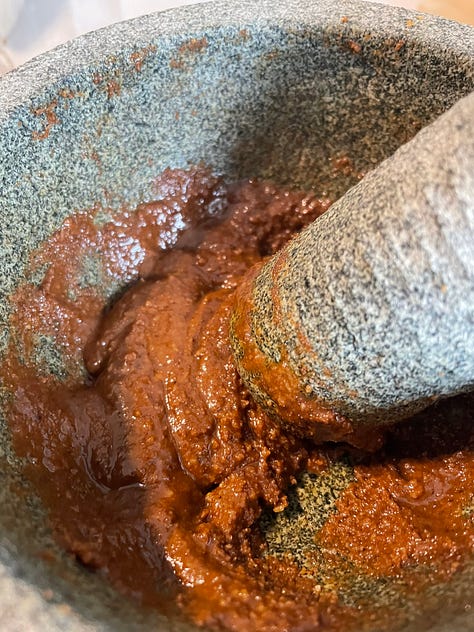
Kerisik: The addition of kerisik — toasted grated coconut processed into an oily paste — is apparently what makes a rendang authentic. But it’s good to understand possibly why this is done, beyond tradition and practice, and the fact that kerisik adds an amazing nutty flavour and body to the dish. As mentioned above, the process of rendang is a means of preservation. Coconut oil contains high amounts of lauric acid, a type of medium chain fatty acid that has an antibacterial effect. The aim of adding kerisik is about increasing the amount of coconut oil in rendang to enhance this effect, thereby extending the rendang’s keeping qualities. It might be an idea to make the kerisik a day before you make the rendang, just to spread the work out a little bit. These are the stages of making kerisik:
Toast 150g of grated coconut (fresh as you can find it or thawed from frozen) in a dry pan over medium heat. Stir and scrape from the bottom of the pan, tossing the coconut gently. Notice that the coconut is clumpy and damp at the beginning, and will begin to emit steam as water evaporates. It will then start to feel lighter and look drier, and will start to pick up colour. Stop when evenly golden brown.
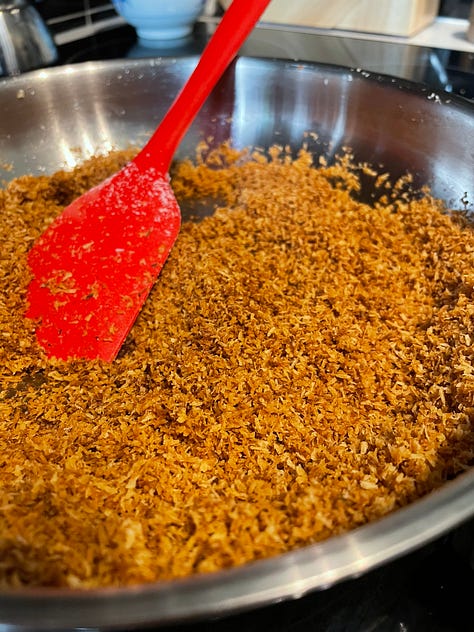
Immediately transfer the toasted coconut to a mortar and grind with a pestle until it begins to clump together, shine with the oil that is being extracted, and form a thick, slightly runny paste. This is your kerisik. Depending on the size of your mortar, you may have to do this in batches. You could use a small food processor to grind the toasted coconut, but pulse in bursts, scraping down if necessary, until you get the right consistency. Store the kerisik in a tightly-lidded container and keep it refrigerated until you need to use it. As it may solidify in the refrigerator, bring it to room temperature well before using it.
The meat
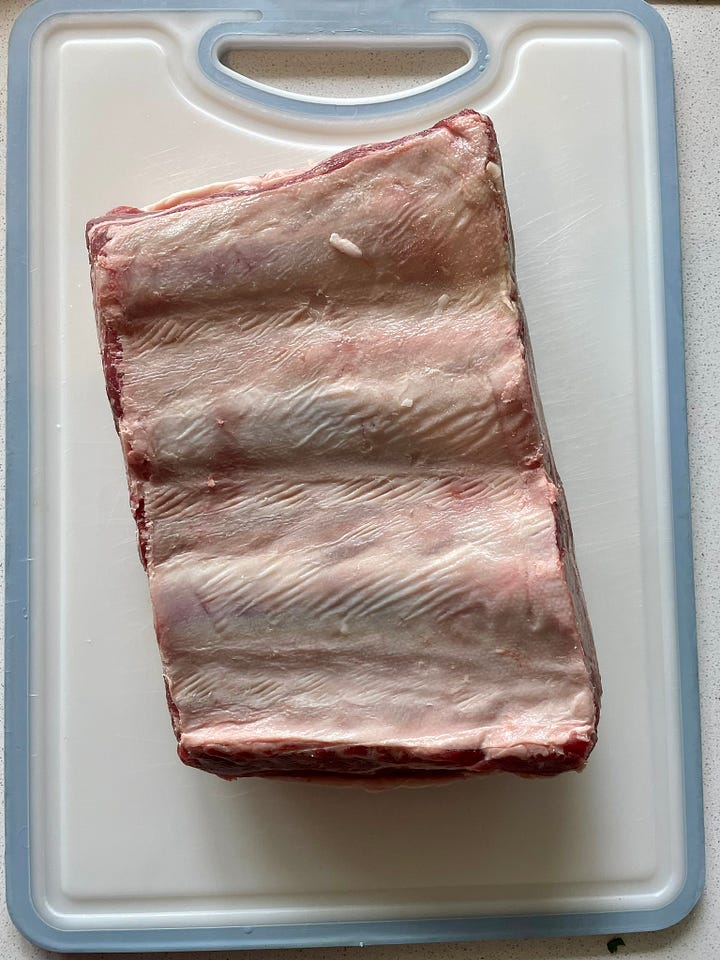
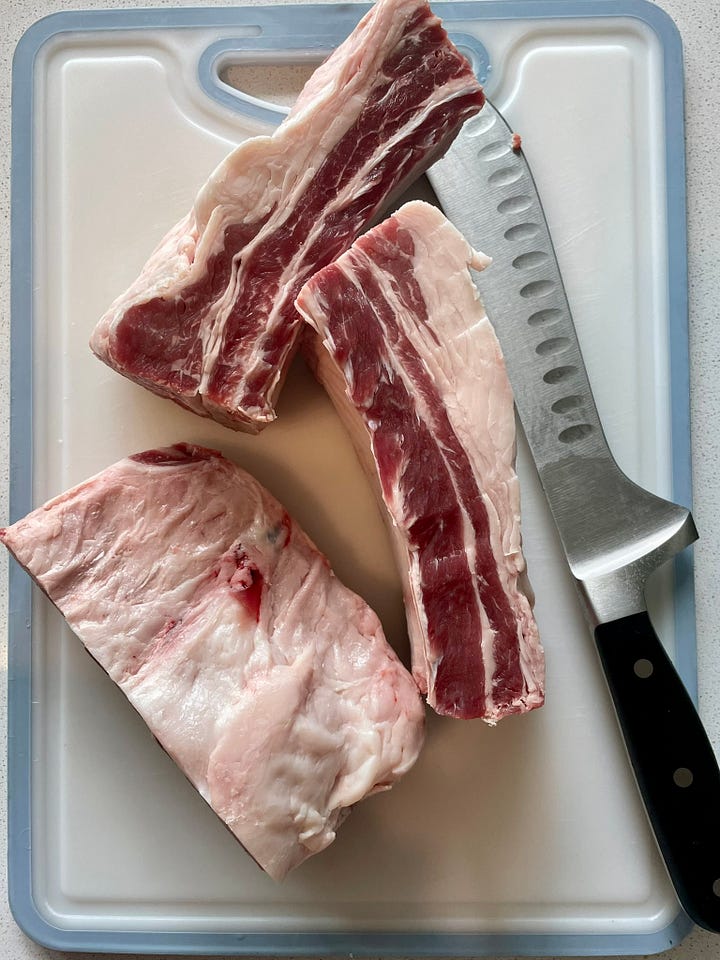
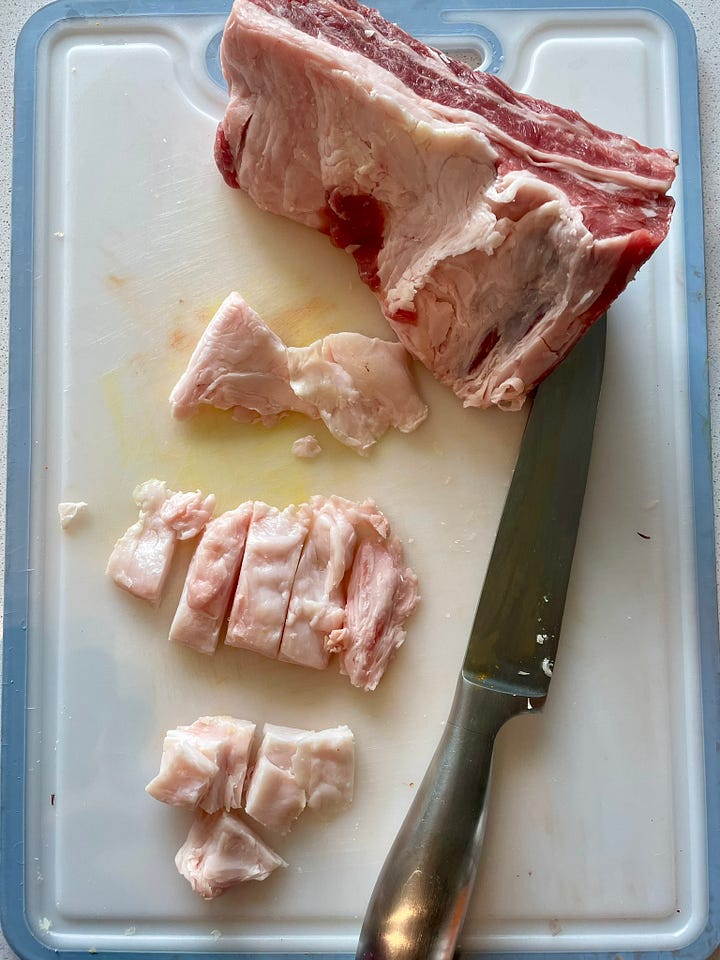
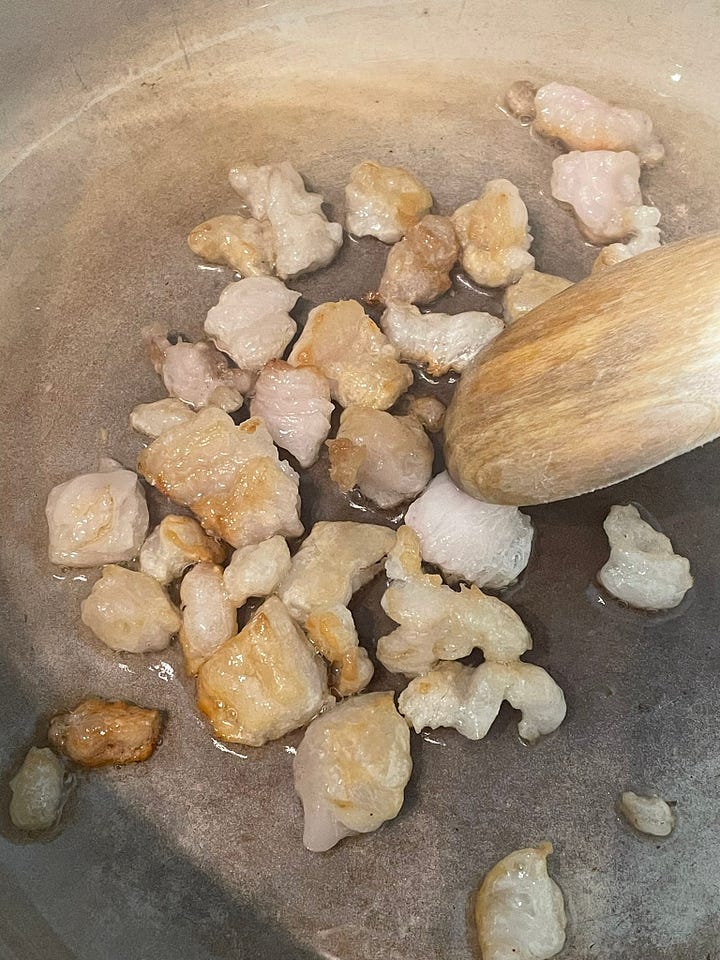
Short ribs are my preferred cut of beef to use — due to all the connective tissue and fat marbling, it stays succulent even when cooked to tenderness. Pictured below is a 'plate' of short ribs, sliced into individual ribs. Don’t discard the fat! It will be rendered and used to start the rempah off.
The process of making rendang
There are three main stages in the making of a rendang.
The gulai stage — The first step of making rendang involves frying off the rempah, but not to the point that it splits from the fat it is frying in. Given the amount of time the rendang takes to make, and the fact that the rempah needs to slowly cook out in the coconut milk/cream, this process will sufficiently concentrate flavour and avoid a flat-tasting gravy due to overcooking. I find it best to use an enamelled cast-iron pan; the thickness of the pan walls retain heat evenly and tough cuts of meat tenderise faster. Be advised; don’t wear white or light-coloured clothing unless you’re ok with stains and spatters on them from the prep and cooking process!
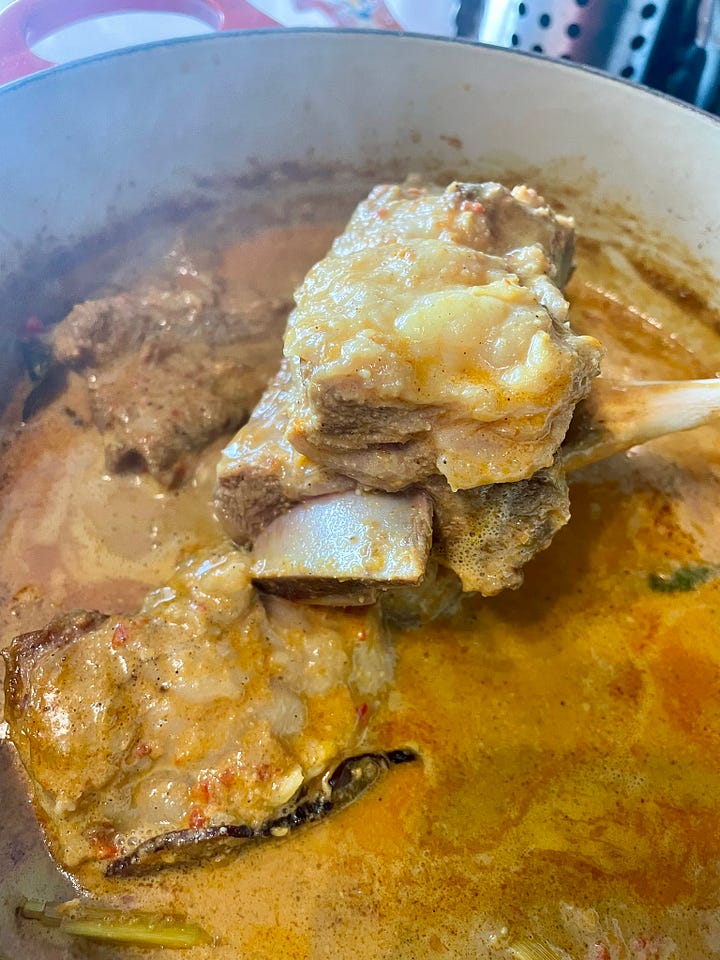
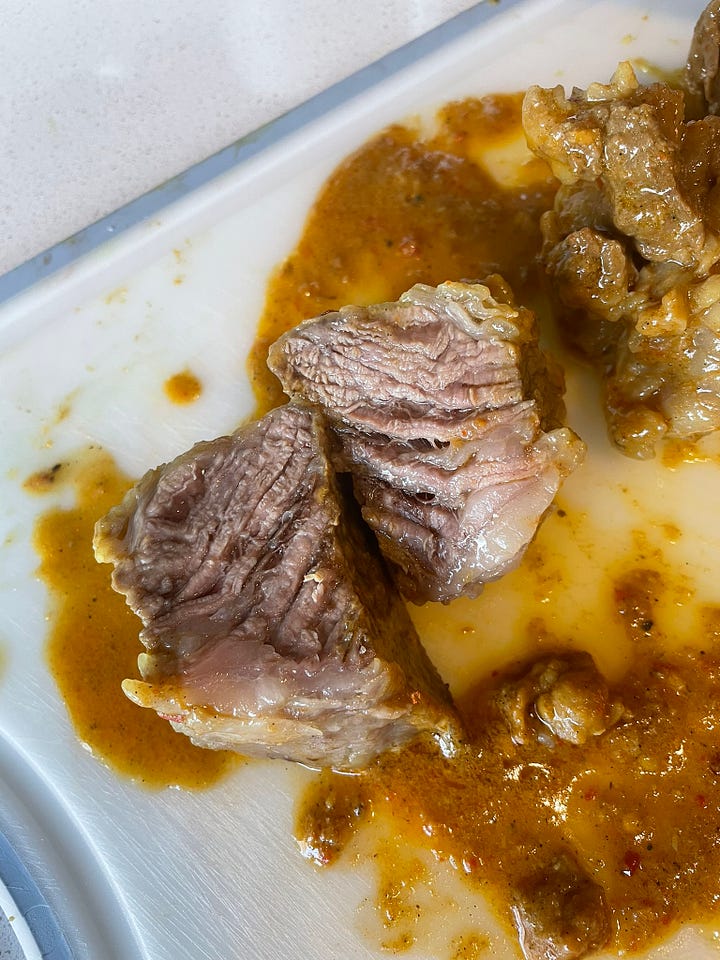
Once the rempah has cooked out for a few minutes, add the meat, coconut milk and cream, and aromatics. Meat for rendang does not have to be seared ahead of the gulai stage of cooking. I get that the searing technique is intended to boost flavour via the Maillard process where proteins are caramelised and some cooks want to 'seal the juices in', but look, you’re gonna be caramelising the whole dish for a LONG time at the end. After 2.5 hours of steady simmering with the pan half-lidded, the mixture resembles a soupy, light golden yellow curry. I retrieve the beef from the pot, remove the bones, then cut each rib into large chunks to facilitate stirring:
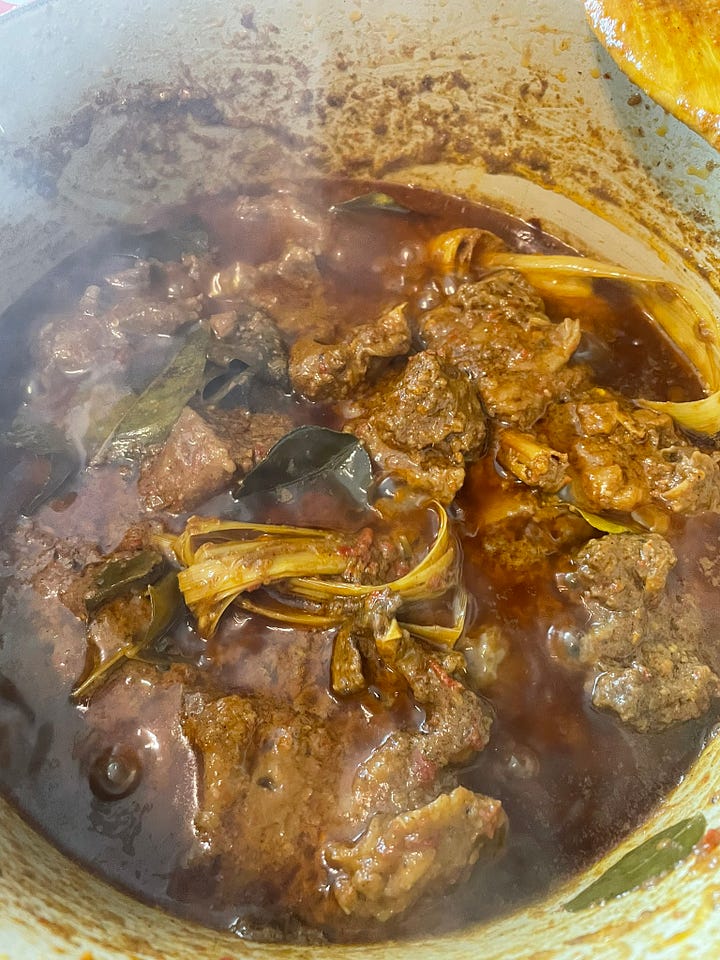
The kalio stage — The mixture should be darkening and releasing more fat as the water component of the gravy reduces. After almost 3 hours of steady simmering, you would obtain a wetter precursor of rendang that is a rich red colour:
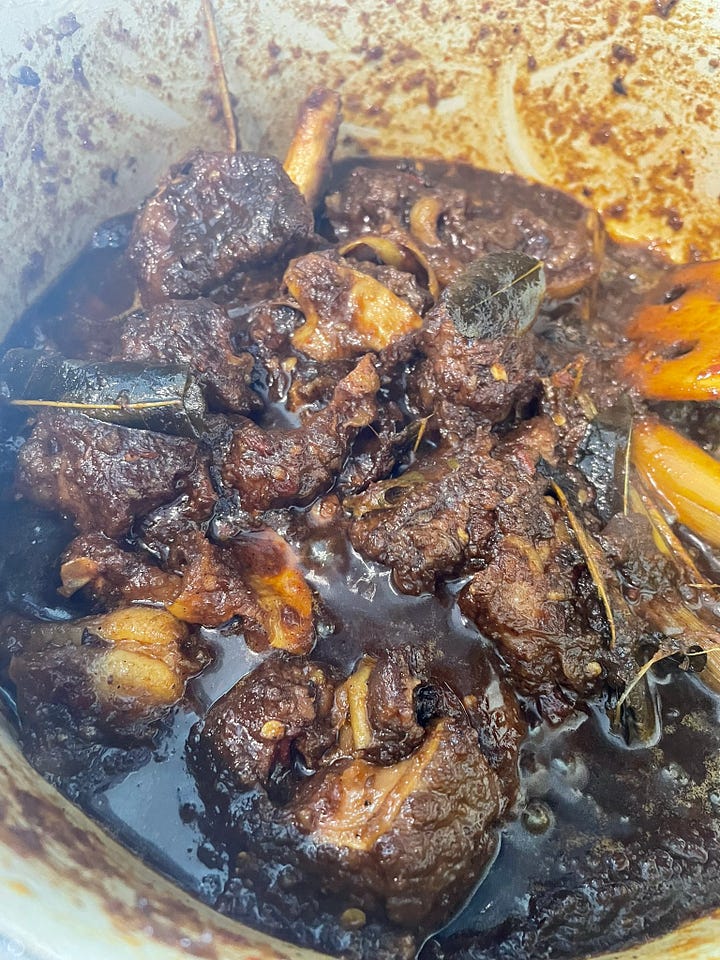
The rendang stage — Some people transfer the kalio to a large wok to reduce and caramelise the gravy at the rendang stage to get a larger surface area for evaporation to take place, but I don’t. If I can get away with one less pan to wash, I am all for it. You also don’t have to add sugar as there’s plenty of natural sugars in the rempah and coconut that eventually make their presence known in the caramelisation.
This stage requires almost 45 minutes of steadily consistent but gentle stirring and caramelising. I use an angled-edge wooden frying spatula for stirring and frying to help me scrape the bottom of the pan as fully as possible. What you are looking for is gravy that is jammy, sticky, and very dark in colour. This is the stage upon which the dish becomes a definitive rendang.
Here in the Netherlands where I live, the rendangs I’ve had have been more consistent, but more often than not, the rendangs served here are closer to a kalio. The one time I had a jammier, stickier version was at this excellent cooked-by-Indonesians-for-Indonesians waroeng in Den Haag. (Pam – let’s go there soon, please!) Apparently, most Dutch prefer a saucier dish to eat with their gestoomde pandanrijst (steamed pandan rice). Conversations about 'what is your ideal rendang' with friends here confirm this. What is important for most of them is that the dish must sing with chilli heat and complex spicing.
Onwards to the recipe in the accompanying newsletter!
Ling Teo thanks her lucky stars for being put to work in the kitchen by her mum at age 7. An avid home cook and baker, her safe spaces are the kitchen and the cookbook section at bookshops. A published writer on other very different topics, she's turning her pen to scrivening random musings on all things culinary.


